
Charlie Brawl Stars: Complete Guide, Best Build and Tips (2026)
Charlie is a Mythic Controller who excels at locking down enemies with her cocoon Super and controlling key areas across multiple game modes. You’ll want to run the Digestive Star Power, Spiders gadget, and Damage plus Shield gears for the strongest build. She’s especially dominant in Basket Brawl and Gem Grab. Master her yo-yo timing and cocoon placement, and there’s plenty more to uncover about maximizing her potential.
Key Takeaways

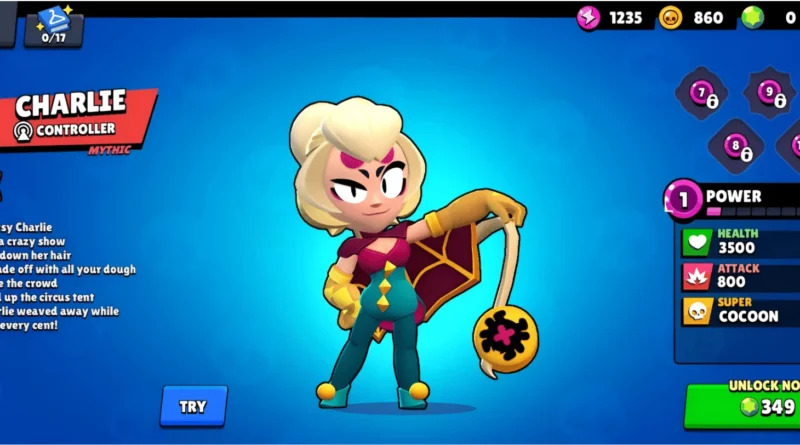
- Charlie is a Mythic Controller with 3,500 HP and a yo-yo attack dealing 800 damage across a 9-tile range.
- The optimal build combines the Spiders gadget, Digestive Star Power, and Damage plus Shield gears for maximum effectiveness.
- Charlie’s Super cocoons enemies with 4,200 health, preventing weapon reload while the Digestive Star Power drains 25% of remaining health.
- Charlie excels in Basket Brawl, Gem Grab, and Brawl Ball, achieving win rates between 70-79% across these modes.
- Avoid long-range opponents and throwers like Barley, as they counter Charlie’s Spiders and exploit positional weaknesses effectively.
- Supercell designed Charlie as a clown-themed character whose hair-based yo-yo attack, cocoon super, and spider gadgets reflect a circus performer identity that makes her one of the most visually distinctive and mechanically sirius multiplayer brawlers in the arena — her information is packed into every ability, from the forward movement of her yo-yo attack to the trail of control she leaves behind with every super activation.
Who Is Charlie in Brawl Stars?
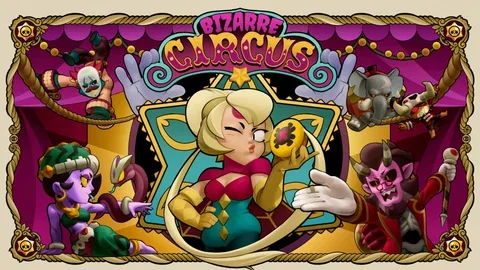
Charlie is a Mythic rarity brawler released in November 2023, classified as a Controller character who specializes in control and utility-focused gameplay. She features a clown-circus design with sleek visuals that reflect her high-tech battle approach — the hair that forms her yo-yo weapon is central to her visual identity and lore. She’s linked to the Bizarre Circus content bundle within the game universe. Her voice actress is Elsa Perusin.
You’ll find Charlie’s real strength comes from her abilities rather than raw damage output. She functions as a versatile mid-range specialist combining hybrid support and damage capabilities, making her effective in both ranked and casual environments. She’s not a frontline brawler, so you’ll need critical spacing and strong battlefield awareness to use her effectively in any arena.
Her yo-yo weapon deals damage on both the outbound and return journey, with each enemy hit on the forward pass and on the trail of the return both contributing to Super charge. Her super wraps enemies in a cocoon bundle of hair, temporarily removing key targets from active gameplay. Correct target selection at the right moments is what makes Charlie genuinely impactful. Her Digestive Star Power causes cocooned enemies to lose 25% of their health, adding significant pressure to her crowd control toolkit.
Brawlers like Gus who generate soul barriers for allies share a similar support-controller archetype with Charlie — both deal moderate damage while generating team advantages through their ability kits rather than raw offense. The key difference is that Charlie’s defense contribution comes from removing enemies entirely, while Gus generates protective content for his own team.
Charlie’s Stats, Attack Range, and Damage Numbers
Charlie packs 3,500 HP and a yo-yo attack that deals 800 damage per hit across a lengthy 9-tile range, giving her solid presence in mid-range engagements. Her attack cooldown sits at 0.5 seconds, and her ammo only reloads after the yo-yo returns, so positioning directly affects your firing rate. You’ll need 7 successful hits to charge her Super, making consistent aim essential for activating her crowd-control potential. Her Super, the Cocoon, travels forward at a speed of 3,300 and wraps enemies in a hair shell with 4,200 health points, meaning opponents must deal significant damage to free their trapped teammate.
Charlie’s Base Stats
One of the first things you’ll want to understand about Charlie is her base stat spread, which reflects a character built around utility rather than raw power. At Level 11, she sits at 7,400 HP, which is moderate for a Mythic rarity brawler, and her defensive rating of just 2 out of 10 confirms she’s not built to absorb punishment. Her primary attack deals 1,600 damage at Level 11, but her offense rating of 4 out of 10 makes clear she’s not a damage dealer either. Her movement speed runs at a standard 720, keeping her in the Normal classification. What makes her viable isn’t her raw numbers — it’s her Cocoon Super, which adds 4,200 health as a separate defensive structure, compensating for her otherwise limited survivability. For comparison, fellow Mythic brawlers like Gene and Finx share that same 720 Normal movement speed, meaning Charlie doesn’t sacrifice mobility relative to her rarity peers.
Attack Range Breakdown
Understanding her base stats gives you the foundation, but knowing how her yo-yo actually behaves in practice is where Charlie’s kit starts to click. Her attack range currently sits at 8.33 tiles following the April 2024 nerf, down from the previous 9 tiles. That still classifies her as a long-range brawler, but her mechanics reward playing closer than you’d expect.
When the yo-yo hits a wall or enemy before reaching max range, it returns faster, resetting your ammo sooner. That shorter travel time means higher effective DPS at close range compared to launching at full distance. You’re not penalized for staying aggressive — you’re actually rewarded. Against short-range brawlers like Mortis or Buzz, tighter positioning turns Charlie’s attack into a rapid, punishing loop.
Her main attack deals 760 damage per hit, a figure that was reduced from 800 in the June 2024 balance update, meaning every yo-yo throw counts on both its outward and return trip.
Super Charge Rate
Charging Charlie’s super takes 6 hits, with each landing at a 16.8% charge rate. That means every yo-yo throw contributes meaningfully toward your next super, making consistent attack pressure essential. If your yo-yo lands a double hit on its return, you’re accelerating that charge even faster.
For hypercharge, you’ll need 10 hits at a 10.075% charge rate per hit. It’s a longer grind, but the payoff — a 26% speed boost, 25% damage increase, and 5% shield — makes it worth prioritizing in longer engagements.
Since Charlie’s attack naturally bounces back to you, you’re constantly generating charge just by playing aggressively. Focus on landing your yo-yo consistently rather than holding back, and you’ll cycle through supers reliably throughout each game.
What Charlie’s Super and Cocoon Actually Do
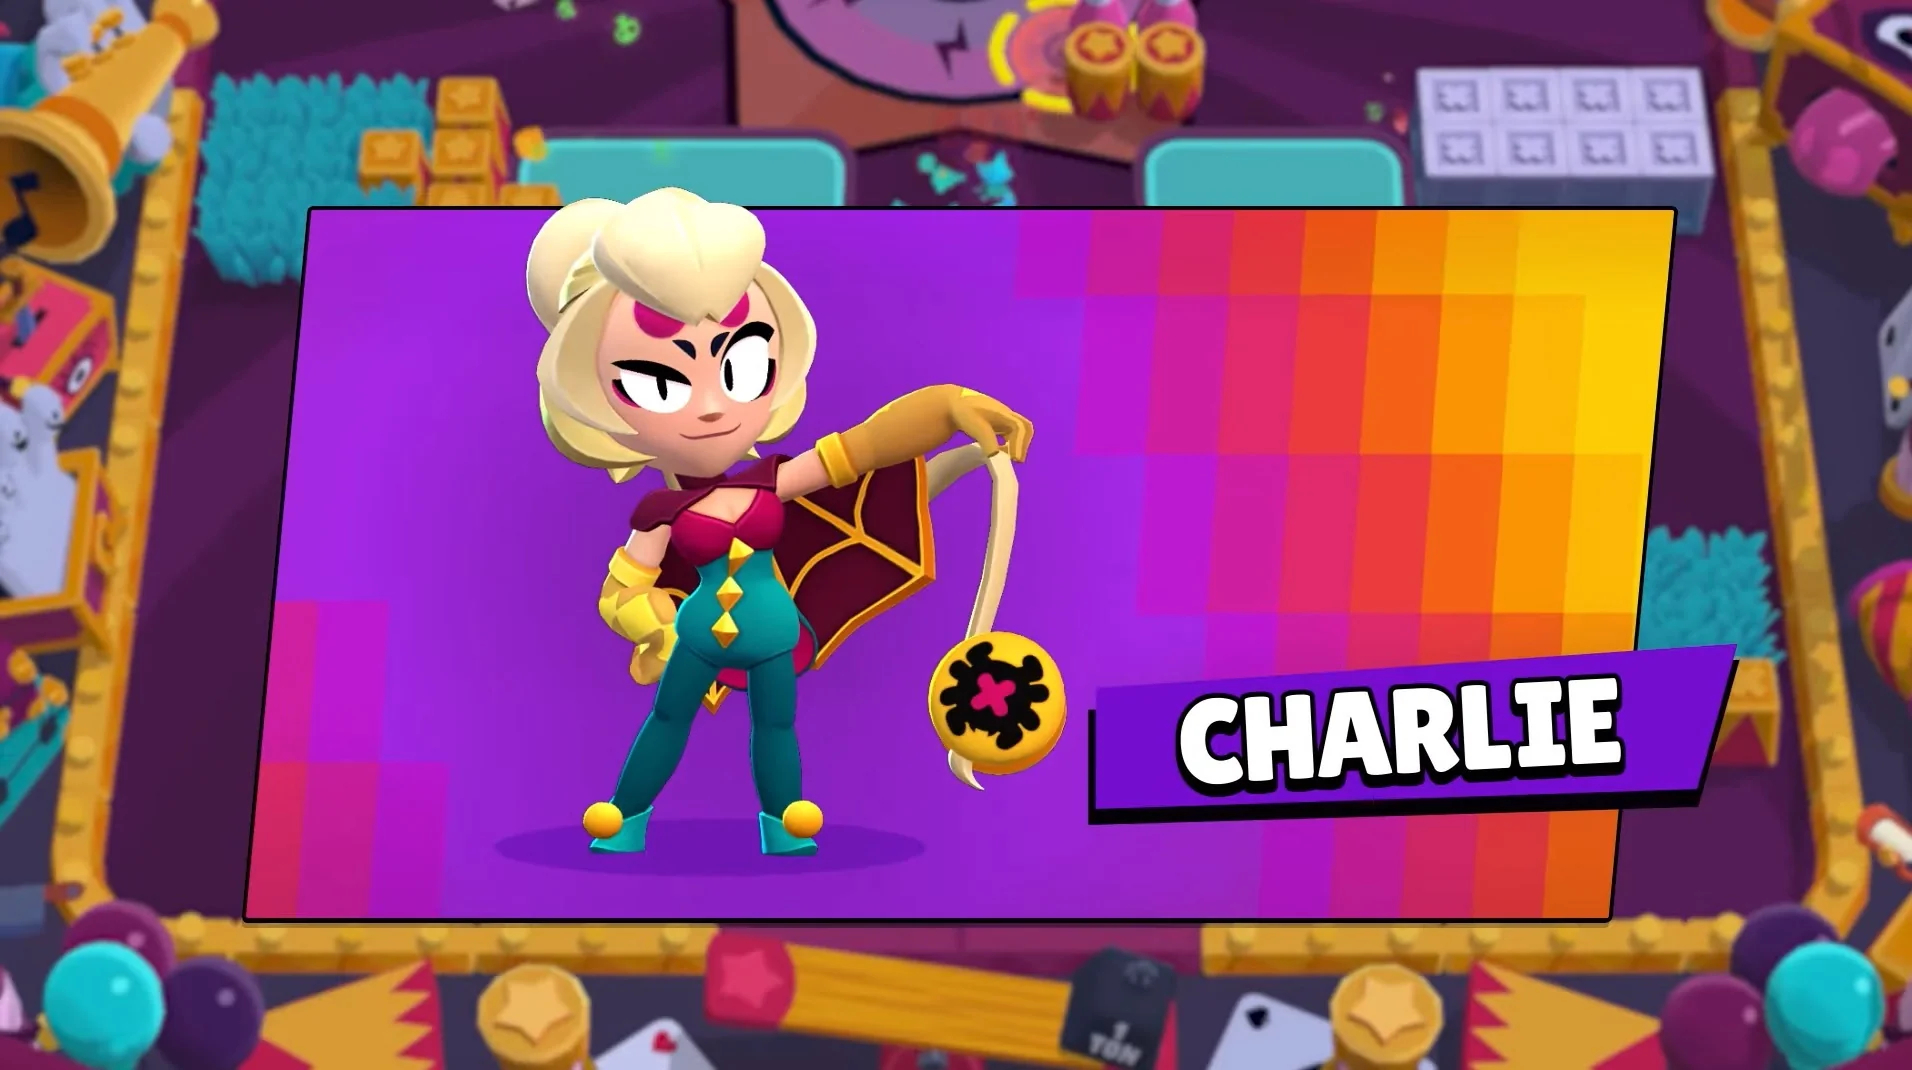
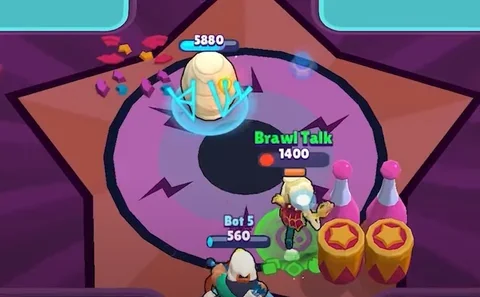
Charlie’s Super launches a bundle of hair forward at long range, and when it connects with an enemy, it traps them inside a cocoon with 4,200 health. The cocoon must be destroyed to free them, giving your team a temporary numbers advantage in any battle situation.
While cocooned, the enemy can still move, heal, and use their main attack, but they can’t reload their weapon. Their super still charges automatically if it builds that way. In Gem Grab, they’ll drop any gems they’re carrying the moment the cocoon hits — this enemy hit mechanic is one of the highest-value super interactions in the entire Gem Grab arena.
With the Digestive star power, the cocoon deals damage equal to 25% of the enemy’s remaining health at the start of cocoon activation, scaling with their max health pool. That makes it especially punishing against tankier brawlers. Fang is one of the counters whose high-speed dash approach is particularly vulnerable to this mechanic — a cocoon hit on Fang mid-dash eliminates his entire forward momentum and removes him from the engagement entirely, stripping him of the close-range advantage his entire kit depends on.
If you’ve got your Hypercharge active, three spiders spawn around the cocoon in a triangular formation, automatically targeting and attacking nearby enemies while you gain a 25% damage bonus and 26% speed boost. Charlie’s other gadget, Personal Space, cocoons Charlie herself, healing 1% of her total health as a defensive escape option.
Charlie’s Best Game Modes and Team Roles
Charlie thrives in 5 key game modes, each playing to her long-range control and cocoon lockdown. Her strongest showing is in Basket Brawl, where she hits a 73.9-79.5% win rate and dominates through zone control. On maps like Lilygear Lake, her win rate climbs to 81.8%, making her a top-tier pick there.
In Gem Grab, you’ll use her cocoon to disable gem carriers and lock down objectives, maintaining a solid 75.6% win rate. Brawl Ball suits her similarly — her cocoon denies the ball and protects goals, while the Spiders gadget handles close-range pressure.
Knockout rewards her long-range yo-yo attack on open maps, and her 70.2% average win rate makes her a reliable elimination pick. Showdown is her weakest category — the isolation format limits the team-multiplier value of her cocoon, since removing one enemy from a solo fight doesn’t create the same numerical advantage it does in team modes. Across all team modes, she plays a control role — locking down enemies, defending objectives, and sustaining teammates with her 4,200-health cocoon.
The Best Charlie Build in 2026
| Build Slot | Best Choice |
|---|---|
| Gadget | Spiders |
| Star Power | Digestive |
| Gears | Damage + Shield |
Run Damage gear to deal 15% extra damage below 50% health, keeping you threatening in close fights. Pair it with Shield gear for 900 bonus health that regenerates every 10 seconds, giving you durability in early exchanges. This combination dominates both ladder and ranked play across the current meta. Reach Power 9 before investing in gears — each power level increases Charlie’s base health and yo-yo damage, and the coins and power points spent on reaching Power 9 pay back through meaningfully improved cocoon survival against higher-health opponents.
Spiders vs. Personal Space: Which Gadget Wins?

When you throw down the Spiders gadget, you release three spiders that hunt down nearby enemies, making it a hard counter against aggressive brawlers like Bull. It’s strong in competitive play and pairs well with the Damage Gear and Gadget Charge Gear, giving you consistent pressure throughout a match. Personal Space does heal you for 50% of your total health, but you’ll only want it on specific maps where playing defensively makes more sense than shutting down your opponents with spiders. The gadgets serve completely different strategic roles — understanding which content type you’re playing determines which of the two gadgets generates more value per activation.
Spiders’ Combat Effectiveness
Choosing between Spiders and Personal Space comes down to what you need Charlie to do. If you’re playing Brawl Hockey against Meeple, B, or Gray, Spiders gives you targeted aggression that Personal Space simply can’t match. The three spiders seek out nearby enemies automatically, making them reliable against pushing brawlers and clustered opponents in Ranked play.
Spiders also synergizes well with your Digestive Star Power, draining 25% health from cocooned enemies while your Vision Gear reveals damaged opponents for two seconds. Add Damage Gear, and you’re hitting 15% harder below 50% health. Against lane-dominant brawlers like Ghost or Bell, Spiders provides soft counter pressure that keeps them honest. In most competitive scenarios, Spiders outperforms Personal Space for pro-level map control.
Personal Space Trade-Offs
Personal Space flips Charlie’s playstyle from aggressive to defensive, giving you a cocoon that restores 50% of your total health on activation. Pairing it with Health gear amplifies that recovery even further, making it a strong sustain option in extended fights.
The trade-off is real, though. Breaking out of the cocoon leaves you exposed, and enemies who anticipate your exit will punish you immediately. You need confidence that nearby threats won’t capitalize on that vulnerability window.
Where Personal Space truly shines is against enemy supers. Using it proactively rather than reactively lets you dodge ultimates entirely and reposition safely. On maps with multiple escape routes, it functions as a reliable reset tool, but it demands precise timing and strong enemy awareness to pay off.
Digestive vs. Slimy: The Right Star Power for Charlie

Charlie’s two Star Powers take fundamentally different approaches to her Super: Digestive deals 25% of a cocooned enemy’s remaining health at the start of the cocoon, while Slimy leaves a 5-second slowing trail along the Super’s path. That trail from Slimy creates a zone-denial strip across the arena that persists independently of the cocoon itself — opponents crossing the trail take movement penalties even if they were never cocooned.
| Factor | Digestive | Slimy |
|---|---|---|
| Function | Burst damage | Area control |
| Best against | High-HP tanks | Mobile dashers |
| Pick rate | 79-82% | 18-21% |
Digestive dominates competitive builds because it converts Charlie’s disable into direct damage, punishing tanky enemies harder due to percentage-based scaling. Pair it with the Spiders gadget for aggressive, damage-focused modes.
Slimy suits open maps where you need zoning and kiting tools, denying movement corridors rather than dealing damage. It’s the minority pick for good reason — control rarely outvalues burst in most game modes.
Default to Digestive, then switch to Slimy specifically when you’re countering highly mobile compositions. Sandy, whose sandstorm conceals teammate positions and creates area denial from a distance, is one of the brawlers who most benefits from Slimy’s trail in a coordinated team — Sandy’s concealment combined with Slimy’s movement slowdown creates a double-layered zone that opponents can’t navigate cleanly.
Best Gears for Charlie and When to Switch Them

Charlie accesses six Super Rare Gears, but Damage and Shield stand out as your top two picks, appearing in builds 35% and 27% of the time respectively. You’ll want to run Damage Gear when you’re pushing aggressive low-health plays, since it activates a 15% damage boost below 50% health, while Shield Gear suits prolonged fights by granting a 900 Health consumable that recharges in 10 seconds at full health. Switching between them depends on your map, enemy composition, and whether you need burst pressure or sustain.
Top Gear Choices
Among the 6 Super Rare Gears available, Damage and Shield dominate Charlie’s best builds, appearing together in the majority of top setups. Damage activates 15% extra damage below 50% health, making it essential near knockouts. Shield provides 900 consumable health, regenerating in 10 seconds, keeping you alive in early encounters. If you prefer aggression, swap Shield for Cooldown to spam the Spiders gadget more frequently.
| Gear | Effect | Best For |
|---|---|---|
| Damage | +15% damage below 50% HP | Ranked, head-to-head |
| Shield | 900 HP shield, 10s regen | Survivability |
| Cooldown | Faster gadget recharge | Aggressive playstyles |
Damage holds a 35% pick rate, Shield follows at 27%, confirming their reliability across 67+ user builds.
Situational Gear Switching
Switching gears mid-session sharpens your edge across every mode and matchup. In Brawl Ball, prioritize Shield early for its 900-health buffer, letting it regenerate in 10 seconds between engagements. Drop to Damage when your health falls below 50%, gaining 15% extra output to secure kills in Gem Grab or Heist rotations. Against mobile assassins or tank-heavy lineups, spam Spiders using Gadget Cooldown for consistent area denial. On open maps, Shield covers aggressive approaches before cocoon setups, while close-quarters fights trigger Damage more frequently. During late-game clutches, that 15% boost below 50% health often decides the round. Post-knockout downtime is ideal for Shield regeneration. Pair Damage with your Hypercharge phase to amplify Digestive Star Power’s 25% health drain on cocooned enemies.
Damage Versus Shield
When it comes to Charlie’s gear setup, Damage and Shield dominate community builds, appearing in 35% and 27% of configurations respectively. Together, they form Charlie’s standard and most effective pairing.
Here’s why this combo works so well:
- Damage Gear boosts your output by 15% below 50% health, turning close duels in your favor — especially when paired with Charlie’s 1,600-damage yo-yo attack.
- Shield Gear grants 900 extra health upfront, giving you a critical buffer against burst damage during early fights.
- Both gears complement each other — Shield protects you early, while Damage carries you through low-health situations later.
You don’t need special gears here. Stick with this pairing, and you’ll cover both aggressive and defensive scenarios efficiently.
Charlie Gameplay: Combos, Positioning, and Super Timing
Mastering Charlie comes down to three core pillars: smart combos, disciplined positioning, and precise Super timing. Chain your yo-yo into a Super to trap enemies instantly, then activate Spiders Gadget to deal chasing damage throughout the cocoon duration. Against high-health targets like Shelly, this burst combo is devastating.
Stay at mid-range to safely charge your Super while pressuring enemies with your 8.33-tile attack range. Near objectives, your Super becomes a disarm tool that flips arena fights without spending ammo.
| Situation | Recommended Action |
|---|---|
| Enemy dashes or activates Super | Cancel it with your Super |
| Gem carrier spotted | Cocoon them to force instant drops |
| Low health, under pressure | Use Personal Space for defensive healing |
Time your Super against high-health targets while running Digestive Star Power for a 25% health reduction, maximizing your burst potential during critical team fights. Seasonal events that rotate game modes — particularly the Bizarre Circus content events tied to Charlie’s release — often feature maps that favor her kit specifically, so monitoring the events calendar for those updates pays off in trophy-pushing sessions.
The Best Counters to Charlie and How to Beat Them
Charlie’s biggest weakness is her inability to close gaps against long-range opponents, and the right counters exploit this mercilessly. If you’re facing Charlie, prioritize these counter picks:
- Throwers like Barley, Juju, or The Twins — Their area-of-effect damage destroys spider swarms before they reach you, and Charlie can’t close distance against them.
- Penny — Her piercing projectiles negate spider defensive value entirely, and her turret forces Charlie into terrible positioning or wastes resources eliminating it.
- Stun and knockback brawlers — Crowd control interrupts Charlie’s cocoon super, stripping her ability to disable you during critical engagements.
If you’re playing Charlie, avoid extended fights against these matchups. Tanks also struggle when you equip Digestive Star Power, since bonus damage activates below 50% health, punishing close-range traders who rely on health pools to win trades. Charlie’s defense profile — fragile base health compensated by cocoon displacement — means brawlers with high burst who can kill her before she activates Personal Space are her most dangerous counters in any multiplayer format.
Frequently Asked Questions
Can Charlie’s Spiders Target Enemies Inside Bushes?
Yes, Charlie’s spiders can target enemies inside bushes. They’ll follow and attack hidden foes, making them perfect for scouting bush-heavy maps without putting yourself at risk of taking damage.
Does Charlie Work Well in Power League Ranked Matches?
You’ll find Charlie thrives in Power League. Her Super counters short-range brawlers like Mortis and Edgar, she closes distance on long-range foes, and her utility shines in team-based ranked modes.
How Many Trophies Do You Need to Unlock Charlie?
You don’t need trophies to access Charlie. You’ll get her through the Brawl Pass at Tier 30 in Season 21: Bizarre Circus, or you can gain her via Starr Road progression instead.
Can Two Charlie Players Stack Cocoons on the Same Enemy?
You likely can’t stack two cocoons on the same enemy. If a second Charlie hits an already-cocooned target, it’ll probably just refresh or override the first cocoon rather than applying a separate one.
Does Charlie’s Cocoon Interact With Healing From Teammates?
There’s no confirmed interaction between teammate healing and Charlie’s cocoon. Enemies trapped inside can’t receive healing, but whether external healing boosts cocoon health remains unconfirmed — don’t rely on it as a strategy.
Conclusion
You’ve now got everything you need to dominate with Charlie in Brawl Stars. Whether you’re trapping enemies in cocoons, picking the right star power, or building the perfect gear setup, Charlie rewards smart play and good positioning. Apply these tips in the right game modes, stay aware of your counters, and you’ll climb the ranks faster than you’d expect. Now get out there and start wrapping your opponents up.
