
Shade Brawl Stars: Complete Guide, Best Build and Tips (2026)
Shade is a close-range brawler whose ghost mechanics let him attack and phase through walls, but his numbers have moved since this guide first went live. As of August 2026 he’s sitting at a 44.3% overall win rate and a below-average rating on the current meta tracker, down from the 60.7% figure this guide originally quoted. The build hasn’t changed (Longarms and Hardened Hoodie are still the pick), but which modes and maps actually favor him has. This guide reflects the current numbers, not the ones from when Shade launched.
Key Takeaways
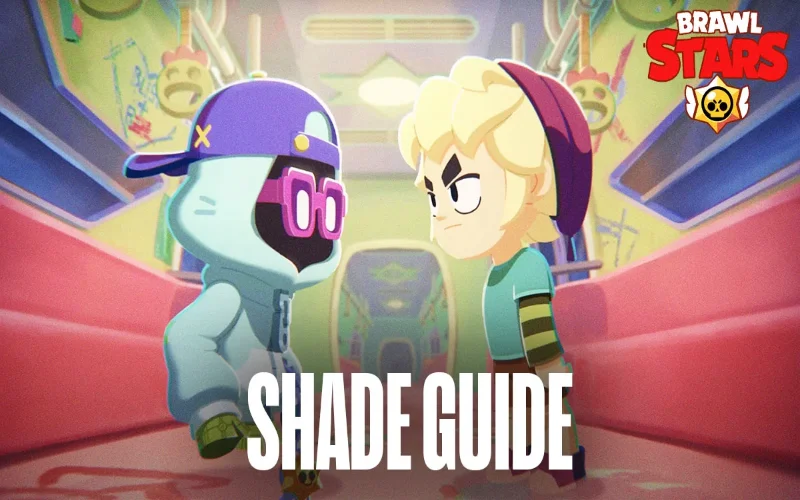
Shade’s build hasn’t shifted, but two things have: his win rate has dropped and his best modes have changed. Longarms (85% pick rate) and Hardened Hoodie (68% pick rate) remain the community-standard picks across 184 tracked builds, paired most often with Damage and Shield gears. His Haunted Hug attack still deals 800 damage per hit, roughly doubling on a center hit, across a 150° spread that pierces walls at close range. Incorporeal Form now runs a 5-second duration rather than the six seconds we originally reported, phasing Shade through walls and cutting incoming damage by 30% with Hardened Hoodie equipped. His Radius Trait charges Super at 3.375% per second for each enemy plus one inside a 6-tile circle, which works out to 6.75% per second with a single enemy nearby. The mode list has changed the most: Trio Showdown, Hot Zone, and Heist are now his strongest modes, and Heist specifically has gone from a mode we told players to avoid to one of his three best.
What Shade Actually Does in Brawl Stars
Shade’s Character Overview
Shade is a Supercell-designed close-range Assassin built around a ghostly character concept that translates directly into gameplay mechanics. His abilities let him walk through walls, absorb less damage while incorporeal, and charge his Super passively by simply being near enemies in the arena. That combination of survival tactics and zone pressure makes him one of the more distinct characters in the Brawl Stars roster, though his current pick rate sits at just 0.8% of games, well below his usage when the meta favored close-range dive brawlers.
His mobile playstyle rewards players who understand wall geometry and can predict where enemies will be rather than reacting to them after they appear. Shade’s character design reflects that strategy: a ghost who moves through obstacles and appears from unexpected angles rather than engaging in straightforward combat. You unlock him through Starr Road progression. For a full overview of how Shade ranks among all brawlers in the current meta, see our best brawlers in Brawl Stars guide.
Shade’s Abilities: Attack and Super
Shade’s attack, Haunted Hug, fires in a 150° spread dealing 800 damage per hit, with a center hit roughly doubling that total. With a close range of around 3.67 tiles and a 0.8-second reload, you’re hitting fast but need to stay close. The attack also shoots through walls, which opens up combat plays most brawlers can’t make, since it doesn’t need line of sight the way standard attacks do.
His Super, Incorporeal Form, lets you phase through walls, move faster, and take 30% less damage if you’re running Hardened Hoodie. It currently lasts 5 seconds, giving you a window to reposition or ambush from unexpected angles; earlier balance patches had it at six seconds, so don’t be surprised if older guides (including earlier versions of this one) quote the longer number. The Radius Trait charges his Super passively whenever enemies stay within a 6-tile circle: the formula is 3.375% per second multiplied by the number of enemies inside plus one, which comes out to 6.75% per second with a single enemy present and faster with more. As of this month, Shade’s win rate sits at 44.3%, which noff.gg currently flags as below average, so treat him as a situational pick rather than an auto-include.
Shade’s Strengths and Weaknesses
Shade’s core strength is his wall interaction. Most brawlers in Brawl Stars treat walls as cover; Shade treats them as tools. He can attack through them, phase through them with his Super, and use them to charge his Super passively from the other side. That gives him a mobility and pressure advantage on wall-heavy maps that marksmen and ranged brawlers fundamentally cannot replicate.
His main weakness is range. At roughly 3.67 tiles, Shade operates in close combat territory where longer-range brawlers like Tara or snipers can outpoke him before he closes distance. On open maps without wall clusters to phase through, his Super loses most of its positional value and he plays as a below-average brawler, which lines up with why his current win rate sits under 50% overall even though specific modes still favor him.
Is Shade Good in Brawl Stars Right Now?
Short answer: he’s playable, but not a strong pick across the board in the current meta. Shade sits at a 44.3% win rate and a 0.8% pick rate as of August 2026, which noff.gg’s tracker currently flags as below average roster-wide. That doesn’t make him bad so much as map- and mode-dependent in a way few other brawlers are. In Trio Showdown he’s genuinely strong at a 77.9% win rate, and Heist and Hot Zone both sit close to even. Outside of those, especially on open maps or in Brawl Ball, his numbers drop well below average.
He’s worth learning if you enjoy wall-heavy positioning and are willing to pick your matches around his strengths. He’s worth skipping if you want a brawler that performs consistently regardless of which map loads. Treat him as a situational specialist rather than an auto-include, and the tips in this guide will get you the most out of the modes where he actually wins.
How to Charge Shade’s Super Fast
Charging Shade’s Super fast comes down to two mechanics: his passive Radius Trait and hit-based cycling. The Radius Trait charges Super at 3.375% per second for every enemy inside the 6-tile circle plus one, so a single nearby enemy gives you 6.75% per second and two enemies push that meaningfully higher. Staying near clustered opponents, rather than isolated ones, is what actually fills the bar fast in practice.
For hit-based cycling, landing 3-4 attacks alongside passive radius charging is usually enough to complete a full Super. Since your attack pierces through opponents, hitting two enemies with one shot accelerates charging further.
Once you activate Super, you can reactivate it during Incorporeal Form to reset the timer and extend your ghostly state. Cycling Super consecutively this way creates extended pressure windows. Prioritize staying near multiple enemies and landing hits that pierce through them to maintain Super availability throughout matches. For another wall-piercing playstyle worth comparing, see our Pierce brawler guide. Notably, the Radius Trait charges even through obstacles, meaning enemies hiding in bushes or invisible opponents still contribute to your Super buildup.
Shade’s Best Build for 2026

Once you’ve mastered keeping your Super charged, pairing that momentum with the right build amplifies Shade’s effectiveness. Community data pulled from 184 tracked builds on noff.gg confirms the same core combination we’ve recommended since launch, though the exact percentages have shifted slightly as the meta moved.
Best Gadget and Star Power
Gadget: Longarms (85% pick rate). Extends your next attack range by 50%, letting you finish enemies or accelerate Super charge without closing dangerous gaps. The Sirius comparison players make to other range-extending abilities is apt here: Longarms turns Shade’s short base range from a liability into a burst-range tool when timed correctly.
Star Power: Hardened Hoodie (68% pick rate). Reduces damage by 30% during Incorporeal Form, turning your Super into an aggressive 1v1-winning tool rather than a pure escape option. This is what separates Shade from other close-range brawlers who take full damage while repositioning. Tick damage and other damage-over-time effects are the main exception: Hardened Hoodie still reduces them, but the reduction matters less against abilities with long durations.
Second Gadget: Jump Scare (15% pick rate). Rather than extending range, Jump Scare emits ghostly energy in a roughly 3.3-tile radius, slowing nearby enemies by 20% for 4 seconds on a 9-second cooldown. It trades Longarms’ finishing power for area denial and escape utility, which makes it a reasonable swap in Heist or Hot Zone if you’re getting collapsed on rather than out-ranging a single target. Longarms is still the default for most matches, but Jump Scare is worth keeping in mind rather than dismissing outright.
Super Speedster, Shade’s other star power, gives a short movement speed boost for center hits and sees roughly 32% pick rate. It’s a legitimate pick in modes like Hot Zone where staying mobile inside a point matters more than surviving a single burst trade, but Hardened Hoodie remains the default because Shade’s biggest weakness is dying during the transition out of Incorporeal Form.
Best Gears and Upgrade Priority
Gears: Damage + Shield. Community pick-rate data actually leads with Damage (36%) and Shield (30%) rather than Gadget Cooldown (13%), and that tracks with how Shade plays now: Damage Gear adds 15% extra damage below 50% health, rewarding aggression, while Shield’s 900 regenerating health covers his low base survivability. Gadget Cooldown is still worth running if you’re leaning hard into Longarms cycling in a slower mode like Heist, but it’s the situational third pick rather than a default.
For upgrades, spend your coins and gems on reaching Power 9 first before investing in gears. Shade’s base health and damage scaling from Power 1 to Power 9 is the most important investment for making his close-range combat viable. After Power 9, unlock Longarms, then Hardened Hoodie, before purchasing the secondary gear.
How to Play Shade’s Attack and Super Together

Mastering Shade’s attack and Super together turns him from a decent brawler into a relentless pressure machine. Use your Super to dash directly into range, then immediately follow with a center-aimed attack; if you land both center hits back to back, that’s a theoretical maximum in the 3,000+ damage range, though landing two center shots in a live match against a moving opponent is genuinely difficult, not a guaranteed combo. The realistic goal is one clean center hit plus a follow-up side hit.
Chain your Supers before the previous speed boost expires to stack extra movement speed, making your attacks harder to dodge. Your fast reload keeps pressure constant during these speed bursts.
Equip Longarms to stretch your post-Super attack range by 50%, and rely on Hardened Hoodie’s 30% damage reduction during Incorporeal Form to survive counterattacks. Against Assassins, activate your Super near walls to feed charge quickly and maintain combo pressure. Shield Gear regenerates its 900 health in 10 seconds at full health, making it a strong option for recovering between aggressive Super chains.
Best Game Modes and Maps for Shade

This is the section that’s changed the most since we first published this guide. Shade’s mode strength doesn’t line up with where he launched anymore, and treating him as a Brawl Ball specialist (our old recommendation) will get you worse results than treating him as the Showdown and Hot Zone pick he currently is.
Per current tracked match data, Shade’s three strongest modes are Trio Showdown (77.9% win rate), Heist (49.2% win rate), and Hot Zone (48.5% win rate). Brawl Ball, which we previously listed as his best mode, now sits at 40.2%, below his overall average. His best individual maps follow the same pattern: Acid Lakes remains a strong pick, but currently as a Showdown map rather than the Brawl Ball map we originally cited, and Knockout Grounds and The Smackdome (both Brawl Arena-style siege maps) now outperform it.
The practical shift for players: Heist is no longer a mode to avoid. His wall-phasing Super is well suited to flanking around the safe, and current data backs that up. Open, wall-light maps and direct trades against ranged marksmen are still where he struggles, regardless of mode. The current map rotation changes regularly, so check which maps are active before locking in your brawler choice rather than relying on a fixed list.
Shade’s Best Teammates, Counters, and Skins
Best Synergies for Shade
Shade’s team value comes from disruption rather than frontline tanking. He works best alongside brawlers who can hold mid-range pressure while he flanks through walls and creates close-range situations his team can follow up on.
Tara is a natural synergy partner. Her Black Hole Super pulls grouped enemies together, which feeds directly into Shade’s Radius Trait charging while setting up a center-hit Haunted Hug for maximum damage. If Tara’s Super clusters three enemies close to Shade, his Super charges rapidly and he can immediately follow with his own repositioning for sustained pressure the opposing team has to break line of sight to escape.
Ranged brawlers who apply sustained pressure from outside Shade’s range complement his flanking role. While they hold lane attention from a distance, Shade uses his Super to appear through walls on the side or behind the enemy position, forcing a choice: defend against the ranged threat and get flanked, or defend against Shade and get outpoked.
How to Counter Shade
The most effective counter against Shade is map selection. On open arena maps without wall clusters, he loses his primary offensive tool and becomes predictable. Long-range brawlers who can outpoke him before he closes his short engagement range consistently win trades in open terrain.
High-damage burst brawlers who can eliminate Shade during the brief window between his Super phases are also effective. When Incorporeal Form expires, Shade returns to physical form and takes full damage; a brawler with enough burst to kill him in that transition window shuts down his cycling strategy entirely.
Tick’s mines are a particularly hard counter, since they cover the areas around wall edges where Incorporeal Form exits are predictable, punishing Shade regardless of which direction he phases through.
Shade’s Skins and Cosmetics
Shade’s skins reflect his ghostly character theme, modifying his visual effects and animation style while keeping his combat abilities identical. Higher-tier skins change the visual appearance of his Incorporeal Form phase-through effect and Haunted Hug attack animation, and his Halloween-adjacent aesthetic makes him one of the more thematically consistent brawlers in the game’s skin lineup.
Skins for Shade are available through standard shop rotation, special events, and limited-time offers. Most don’t require specific trophy milestones to unlock, though event-limited skins require participation during their active window. For the full listing of currently available Shade skins, the Brawl Stars characters section maintains updated information on all brawler cosmetics.
Common Shade Mistakes to Avoid
Using Incorporeal Form purely as a defensive retreat, rather than as an engagement tool for closing distance through obstacles enemies expect to protect them, is the single biggest way players undersell the Super’s value.
A close second is fighting in the open sections of otherwise wall-heavy maps. Shade’s effectiveness in clear terrain drops fast, since his wall-piercing attack loses its advantage and enemies can simply walk away from his short engagement range faster than he can close it.
The third mistake is under-cycling. Many players activate Incorporeal Form, use it once, and let it expire without reactivating, when reactivating during ghost form resets the full duration and lets you stay incorporeal far longer when your Super is properly charged. Gadget Cooldown gear helps here specifically if you find yourself running out of Longarms charges before your Super naturally refills.
Shade Skins in Brawl Stars: Full List and How to Get Them
Shade currently has 6 available skins, including his default look, which is a smaller lineup than veteran brawlers like Colt carry. Two are worth knowing by name if you’re skin shopping: Street Shade, a Brawl Stars Championship 2025 skin with a streetwear-inspired redesign, and Brawlentine’s Bear Shade, a Legendary seasonal skin that leans into his oddball ghost theme with heart-shaped glasses and a cuddly-yet-creepy look. Both keep his combat abilities identical; only the visuals and animations change.
Skins move through three channels: the standard shop rotation, esports-tied releases like Street Shade, and limited-time seasonal events like Brawlentine’s Bear Shade. That means availability shifts throughout the year rather than staying permanently purchasable, so if a specific skin isn’t in the shop when you check, it’s more likely waiting on its next event window than gone for good.
What’s Changed Since Our Last Update
We first published this guide when Shade was averaging a 60.7% win rate, close to the top of the roster. That’s no longer the case. As of this update, his win rate has settled to 44.3%, his pick rate has dropped to 0.8% of matches, and noff.gg’s own battle-trend tracker now flags him as below average. The build recommendation hasn’t moved (Longarms and Hardened Hoodie are still the clear community picks), but the mode advice has flipped in one specific way worth calling out directly: Heist went from a mode we told players to skip entirely to one of his three strongest, likely because his wall-phasing Super lines up well with flanking around the safe once players learned the matchup better. If you played Shade off our original mode list and found Brawl Ball underwhelming, that wasn’t you playing him wrong; the mode strength genuinely shifted.
Frequently Asked Questions

Does Shade’s Radius Trait Work on Hidden Enemies?
Yes. The Radius Trait charges Super from any enemy inside the 6-tile circle, including ones hiding in bushes or turned invisible, so it doubles as an indirect early-warning signal even when you can’t see who’s nearby.
Is Hardened Hoodie or Super Speedster Better for Shade?
Hardened Hoodie is the stronger default at a 68% community pick rate, since the 30% damage reduction keeps Shade alive during aggressive Super plays. Super Speedster is a viable alternative in mobility-heavy modes like Hot Zone, where staying in a point matters more than tanking a hit, but it’s a situational swap rather than a straight upgrade.
How Long Does Incorporeal Form Currently Last?
Incorporeal Form currently lasts 5 seconds. Reactivating the Super while you’re still in ghost form resets that duration, letting you chain phases and stay incorporeal indefinitely as long as you keep your Super charged.
Can Shade Move Through Water Like Other Movement-Based Brawlers?
Yes, Shade can move through water in either form, as one of a small number of brawlers with this water traversal ability. He’ll hover or walk over water tiles without the movement penalty most brawlers face.
How Does the Frightener Hypercharge Affect Shade?
The Frightener gives Shade a 25% damage boost, a 25% speed boost, and a 5% shield boost while Hypercharged, and it guarantees your attacks deal center-hit damage regardless of where you actually hit, removing the positional guesswork from landing max damage.
Conclusion
Shade in 2026 is a different pick than he was at launch: same build, weaker overall win rate, and a completely different set of modes where he actually performs. Run Longarms and Hardened Hoodie, prioritize Trio Showdown, Heist, and Hot Zone over the Brawl Ball games he used to dominate, and keep an eye on how his numbers move next patch, because as this update shows, they don’t stay still for long.
