
Pierce Brawl Stars: Complete Guide, Best Build and Tips (2026)
Pierce is Brawl Stars’ only Legendary Sharpshooter, and his shell-based reload loop is what makes him genuinely dangerous. You’ll want to run Bottomless Mags, Mission: Swimpossible, and Damage plus Shield Gears for ranked play. His main attack pierces enemies, and collecting shells keeps your ammo cycling almost endlessly. He excels in Hot Zone, Knockout, and Gem Grab. Master his positioning and shell management, and everything else about dominating with Pierce starts clicking into place.
Key Takeaways
- Pierce is Brawl Stars’ only Legendary Sharpshooter, featuring a unique reload mechanic triggered by collecting shells dropped from successful hits.
- The optimal build uses Bottomless Mags gadget, Mission: Swimpossible star power, and Damage plus Shield gears for ranked play.
- Mission: Swimpossible slows enemies by 30% on last-ammo hits, enhancing Pierce’s crowd control and shot-chaining effectiveness.
- Pierce excels in Hot Zone, Knockout, Gem Grab, Brawl Ball, and Heist due to his 10-unit long attack range.
- At max level, Pierce’s health reaches 6,000, main attack deals 1,900 damage, and the last shot peaks at 3,000 damage.
What Makes Pierce Unique in Brawl Stars
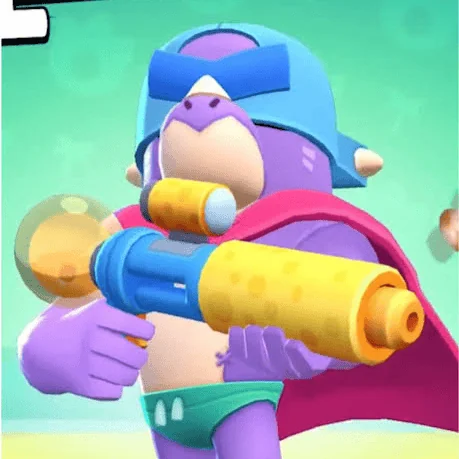
Pierce stands out in Brawl Stars as the only Legendary Sharpshooter, and his reload mechanic is unlike anything else in the game. He doesn’t reload passively. Instead, you reload by either collecting shells or fully depleting your ammo clip.
Every successful main attack drops a shell beside Pierce. Picking it up triggers an automatic piercing shot toward the nearest visible enemy, and that shot restores one ammo. Land your shots consistently, and you can chain shots indefinitely without ever running dry.
Hit your shots, collect the shell, and Pierce never stops firing — accuracy is its own reward.
The risk is real, though. Miss your shots, and you lose access to the reload cycle entirely until you collect a shell or burn through your last ammo.
That last shot matters. It deals bonus damage, making it your strongest hit in the clip. Pierce rewards accuracy with endless pressure and punishes carelessness with a hard stop, making him one of the most skill-expressive brawlers in the game. Those automatic piercing shots can travel through walls and terrain, adding an extra layer of value to every shell you collect.
How Pierce’s Attacks and Super Work

When you fire Pierce’s main attack, Pool Sniper, the projectile pierces through enemies and obstacles, dropping a shell beside Pierce on every successful hit. Collect that shell, and it triggers an automatic piercing shot at the nearest enemy. Chain multiple shells together, and you’ve got a near-endless attack loop. Your last ammo shot also boosts damage by 58%, marked by a yellow indicator, so managing your ammo count matters.
Pierce’s Super marks a 3-tile radius area after a one-second delay, then launches five homing projectiles at every enemy inside it. Each projectile pierces through enemies and obstacles, and every hit drops another shell. That means your Super doesn’t just deal damage — it fuels your next wave of attacks. With base damage scaling from 1,600 to 3,200 per shot at max level, a well-placed Super pressures grouped enemies, forces retreats, and keeps your shell loop running throughout the fight. Shells dropped from the Super have a limited lifespan, so act fast — shells despawn after 6 seconds if left uncollected.
Pierce’s Stats, Health, and Base Damage
Pierce starts with 3,000 health at level 1 and caps at 6,000 at level 11, which is relatively low compared to tankier brawlers. His main attack deals 950 damage per shot at level 1, scaling up to 1,900 at level 11, with his last shell hitting 58% harder. You’ll also benefit from his very long attack range, letting you deal consistent damage from a safe distance. His normal movement speed keeps him balanced, preventing him from being either too elusive or too sluggish when repositioning on the battlefield.
Pierce’s Base Health
As a marksman, Pierce starts with 3000 health at Level 1, scaling linearly to 6000 at max Level 11. He hits 4200 at Level 5 and 5400 at Level 9, doubling his base health by max level. While 6000 matches the marksman average alongside brawlers like Brock and Mandy, it’s far below tanks and assassin targets like Bonnie at 10,000.
This low survivability means you’ll need to prioritize long-range positioning and smart shell management. Without proper spacing, aggressive brawlers and assassins will punish you quickly. Pairing Pierce with the Shield Gear adds 900 health, offering a small buffer in tighter situations. His health pool suits a poke-heavy playstyle, rewarding patience over aggression in every game mode. At max level, Pierce deals 1,900 damage per shot, meaning his offensive output must compensate for what his health pool lacks in raw durability.
Pierce’s Damage Output
While Pierce’s health keeps him fragile, his damage output more than compensates when you manage his shell mechanics well. His main attack starts at 950 damage at level 1, scaling to 1,900 at level 11. His shell auto-shot mirrors those exact numbers, effectively doubling your pressure on enemies.
Here’s what makes Pierce’s damage truly threatening:
- Last ammo deals 58% bonus damage, spiking to 3,000 at max level — enough to delete low-health targets instantly.
- His super fires 5 homing projectiles, dealing up to 3,200 damage at level 11, giving you reliable burst even against mobile enemies.
- Piercing shots hit multiple lined-up enemies, turning tight corridors into devastating kill zones that reward smart positioning.
Pierce is classified as a Legendary Marksman, making his damage ceiling one of the highest among his rarity tier and reinforcing why proper shell management is essential to unlocking his full potential.
Pierce’s Attack Range
Three core stats define how Pierce operates on the battlefield: his attack range, base health, and damage output. Pierce’s Pool Sniper attack carries a very long range classification, reaching 10 units at maximum level. This puts him on par with elite snipers like Piper and Belle, letting you deal damage before enemies can close the gap.
You’ll want to use this range advantage consistently because Pierce’s reload speed is extremely slow. Unlike standard brawlers, he can’t automatically reload through traditional means. Instead, you’ll collect shells manually to restore ammunition.
That said, his long range directly compensates for this vulnerability. You can harass opponents from a safe distance, minimizing the risk of being caught without ammo during a close-range encounter.
Best Gadgets for Pierce
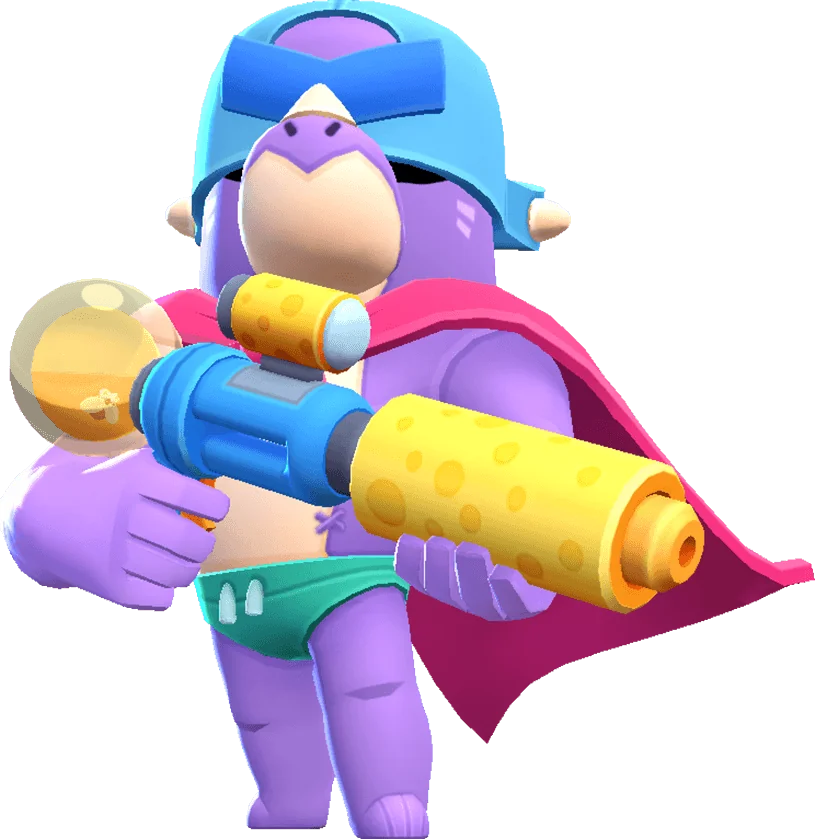
Pierce has 2 gadgets to choose from: Bottomless Mags and You Only Brawl Twice. Each serves a distinct playstyle, so picking the right one directly impacts your performance.
Pierce wields two gadgets, each built for a different playstyle — choosing correctly makes all the difference.
Bottomless Mags instantly reloads one ammo slot, drops a shell, and auto-fires it for an extra hit. It’s ideal when you’re struggling with shot consistency or need reliable damage in aggressive metas.
You Only Brawl Twice absorbs all nearby shells, shields you up to 4,800 HP, and knocks back enemies. It’s your survival tool against tanks and close-range threats.
Choose based on your situation:
- You’re missing shots often — Bottomless Mags compensates and keeps your damage flowing.
- You’re getting overwhelmed up close — You Only Brawl Twice buys you space and survivability instantly.
- You’re facing Saturn — both gadgets remain viable, so adapt to the matchup.
Pierce’s Best Star Power: Mission Swimpossible
When it comes to Star Powers, Mission Swimpossible outperforms Slip’n Snipe in nearly every scenario. It slows enemies by 30% for one second when Pierce’s last ammo connects, while also boosting that shot’s damage by 58% before the slow applies. That combination turns low-ammo situations into genuine kill opportunities rather than desperation plays.
The slow directly enhances your core ammo loop. After collecting a shell, your automatic piercing shot benefits from the enemy’s reduced movement, improving hit accuracy and sustain. Slip’n Snipe’s 15% speed boost lasts the same duration but only helps you reposition, offering no crowd control value in team fights.
Mission Swimpossible counters dodging enemies, slows tanks pushing into your range, and lets teammates secure eliminations more reliably. In prolonged engagements, you can chain slows continuously, maintaining constant pressure. Paired with Damage and Shield Gears, it’s the standard choice in competitive and team fight builds.
Best Gears to Run on Pierce

For Pierce, you’ll want to run Damage Gear as your primary pick, since it’s the most impactful gear in the game and gives you the edge in direct confrontations. Pair it with Shield Gear to shore up Pierce’s naturally low health pool, making him far less vulnerable in aggressive metas. If you’re running a gadget-heavy build with Slip’N Snipe, swapping Shield Gear for Gadget Cooldown Gear is a strong alternative that keeps your abilities cycling faster.
Top Gear Picks
Running two gears on Pierce is the standard setup, and Damage should always be your first pick. It’s the most-picked gear at 34% usage among Pierce players, boosting your damage output in aggressive head-to-head fights. For your second slot, Shield is the go-to choice, granting up to 4,800 extra health when you absorb all four shells through your gadget.
Here’s why this combination works:
- Damage Gear lets you win duels before enemies close the gap, protecting Pierce’s range advantage.
- Shield Gear pushes your effective health well beyond your 6,000 base, keeping you alive against aggressive opponents.
- Health Gear steps in situationally when you’re facing heavy-damage threats and need extra frontline durability.
Gear Synergy Tips
Gear synergy is what separates good Pierce players from great ones, so understanding how each gear complements his kit gives you a real competitive edge. Damage Gear and Shield Gear form the strongest two-gear combination, covering both offensive and defensive needs simultaneously. Shield Gear’s 900 extra health directly offsets Pierce’s low base HP, while Damage Gear’s 15 percent damage boost activates exactly when you’re in danger, turning low-health situations into comeback opportunities. If you’re playing longer matches with extended engagements, Gadget Recharge Gear replaces Shield Gear effectively, giving you more frequent shell absorption from Bottomless Mags. Against oppressive brawlers, swap back to Shield Gear for the survivability boost. Ultimately, your gear choices should reflect both your playstyle and your opponent’s composition.
The Optimal Pierce Build for Ranked Play

When building Pierce for ranked play, you’ll want to run Bottomless Mags as your gadget, Mission: Swimpossible as your star power, and Damage and Shield as your gears. This core setup, curated from 50 user builds, maximizes damage efficiency, ammo sustain, and control across competitive environments.
Bottomless Mags keeps your pressure constant by reloading one ammo on activation, while Mission: Swimpossible slows enemies by 30% on your last ammo, turning near-misses into confirmed kills. Shield Gear adds 900 health to offset Pierce’s low base HP, and Damage Gear spikes your output by 15% below 50% health.
Bottomless Mags and Mission: Swimpossible together create unstoppable pressure — slowing enemies while keeping your ammo topped off.
Here’s why this build hits differently in ranked:
- You’re never out of ammo — Bottomless Mags eliminates downtime during clutch moments.
- Slowed enemies can’t escape — Mission: Swimpossible locks down retreating opponents.
- You survive longer — Shield and Damage gears keep you dangerous even when pressured.
Best Game Modes and Maps for Pierce

Pierce thrives in modes where his long range and chaining shots can dominate open engagements, and Hot Zone is his best home. Its sniper-friendly, mid-range maps let you chain shots across zones, pressure tanks, and maximize the Slow star power’s damage boost. You’ll control zones effortlessly while enemies struggle to push through your sustained fire.
Brawl Ball is another strong pick. Use walls to camp and snipe, spam shots to control enemy approaches, and chain hits to stop tanks like Frank from advancing. Open maps especially amplify your long-range dominance.
Gem Grab rewards your versatility across layouts. Open maps let you dominate engagements freely, while walled maps offer safe sniping spots to secure gem collection. Knockout suits your marksman role perfectly, your longest-range advantage shines in 1v1 situations, and your Super delivers clutch eliminations. Heist also works, letting you pressure the safe from distance while controlling space.
How to Position and Manage Shells Effectively
Mastering shell management starts with your positioning. Hug walls for safe peeks, but never stand directly beside them when firing—shells can spawn behind obstacles and become unreachable. Push toward open center areas like triple dribble zones where shell pickup is faster and cleaner. Shift between long-range pokes and mid-range to trigger shell auto-shots consistently.
When you’re collecting shells, timing matters more than you’d think:
- Grab shells immediately after your last ammo shot—it triggers the yellow bar, boosting your damage output by 58%.
- Pick up shells even at full ammo—you’ll force an auto-piercing shot on the nearest visible enemy, keeping pressure constant.
- Collect shells near enemies deliberately—the 15% movement speed burst lets you escape or reposition before they punish you.
Missing shots breaks your reload loop entirely, so precision isn’t optional—it’s survival.
Frequently Asked Questions
When Was Pierce Officially Released in Brawl Stars?
Pierce was officially released on Starr Road on January 1, 2026, making him the first brawler of the year. However, you could’ve accessed him early starting December 19, 2025, through Pierce Boxes.
Is Pierce Considered a Good Brawler for Beginners?
Pierce isn’t a good brawler for beginners. You’ll struggle with his steep learning curve, complex shell mechanics, low health pool, and the need for advanced positioning and resource management skills he demands.
How Often Should Pierce’s Gadgets Be Used per Match?
You should use Pierce’s gadgets 3-4 times per match, with an 18-second cooldown. Use Bottomless Mags consistently during offensive pushes and save You Only Brawl Twice defensively for critical mid-to-late match moments against aggressive divers.
What Is Pierce’s Rarity Classification in Brawl Stars?
You’ll find that Pierce is classified as a Legendary brawler in Brawl Stars. It’s one of 13 brawlers in this tier, making it quite rare and difficult to access, with only a 0.323% drop rate.
Has Pierce Received Any Balance Changes Since His Release?
Yes, Pierce has received multiple balance changes since his release! You’ll find that developers primarily targeted his hypercharge mechanics rather than base stats, adjusting super costs to prevent him from becoming overpowered in competitive play.
Conclusion
You’ve now got everything you need to dominate with Pierce in Brawl Stars. By running the right build, choosing the best game modes, and mastering shell management, you’ll consistently outperform opponents who underestimate this brawler. Don’t sleep on his positioning potential—it’s what separates average Pierce players from top-tier ones. Jump into ranked, apply these tips, and you’ll climb faster than you’d expect.
