
Piper Brawl Stars: Complete Guide, Best Build and Tips (2026)
Piper is an Epic Marksman in Brawl Stars whose sniper shot does five times more damage at the end of its range than it does point-blank: 720 up close and 3,600 at max range at Power 11. Almost every decision you make with her, from build to map pick, comes back to that one number. The build we recommend is Auto Aimer, Snappy Sniping, Shield Gear and Damage Gear, and she belongs on open Bounty and Knockout maps rather than in Gem Grab. Her worst matchups are fast divers like Leon and Stu, and you can see where she lands against the full roster in our Brawl Stars tier list.
The Short Version

If you only have a minute: run Auto Aimer as your panic button, Snappy Sniping to keep ammo flowing when you hit, and stack Shield Gear with Damage Gear so you survive the first dive and hit harder once you are below half health. Then play from the back wall. A recent balance update raised her base health from 2,500 to 2,800 and her max-range damage from 1,700 to 1,800 (per Supercell’s official release notes), so she is a little sturdier than older guides suggest, but she is still one of the easiest brawlers in the game to punish once someone reaches her.
Who Is Piper and Why She Dominates Long Range
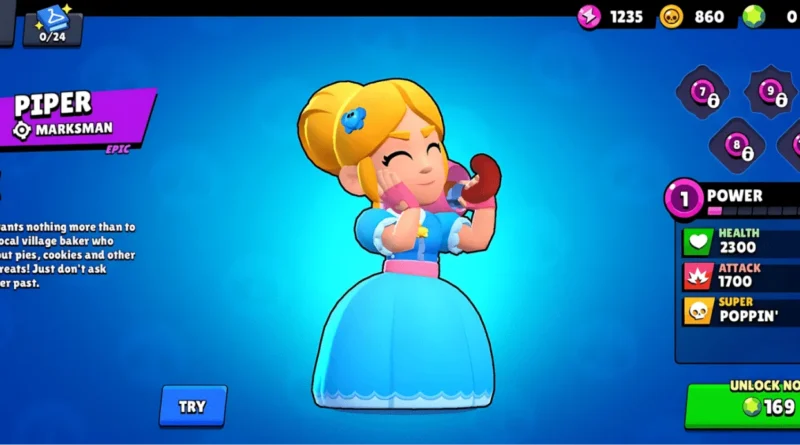
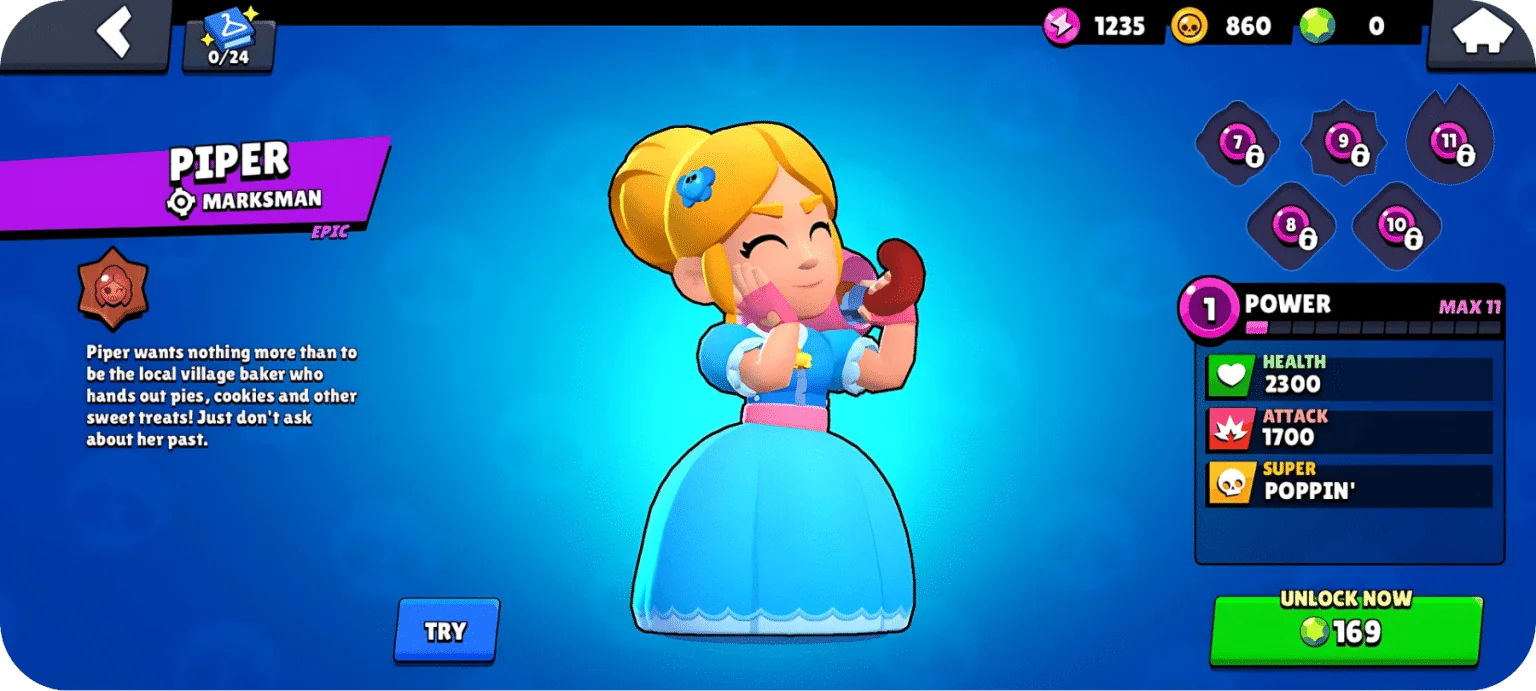
Piper turns a parasol into a long-range sniper rifle. She is written as a high-society lady who keeps unwanted suitors at arm’s length, quite literally, and her kit is built the same way: she has been in the game since July 3, 2017, and her shot (the Gunbrella) has always rewarded distance over everything else.
Her damage scaling is the core of her identity. Close to her, a shot does 20% of its maximum. At the end of her 10-tile range it does the full amount. That forces the enemy to make a choice: walk toward her under fire, or stay at the distance where she is strongest. Neither is comfortable, which is why she earns a slot on maps with long, open sightlines.
The weakness is just as clear. She has three ammo, a slow 2.3-second reload and no mobility outside her Super. If a brawler like Fang or Kit gets on top of her, she has very little left to fight with. Her Snappy Sniping star power softens the reload problem by refunding ammo on hits, which is why accuracy matters so much more on Piper than on most brawlers.
Piper’s Strengths and Weaknesses
Piper is a simple character to describe and a hard one to play well, because her strengths and weaknesses come from the same place: distance.
Strengths: one of the heaviest single shots in the game at max range, a 10-tile reach that lets her hit the enemy team before most of them can answer, and a Super that doubles as her only escape ability. When a match turns into a long-range standoff, very few brawlers win the trade against her.
Weaknesses: a point-blank shot does a fifth of its max damage, she has only three ammo with a slow reload, and every miss costs her more than it costs most brawlers. Walls, thick bushes and anyone fast enough to close the gap all work against her. If the map or the enemy team takes her range away, she has no backup plan.
Piper’s Stats, Attacks, and Super

Every figure below is taken from a named tracker or from Supercell’s own patch notes. Power 11 values are double the Power 1 values, because each Power Level adds 10% of the base stat.
| Stat | Power 1 | Power 11 | Source |
|---|---|---|---|
| Health | 2,800 | 5,600 | Supercell release notes, Brawlify |
| Main attack, point-blank | 360 | 720 | Brawl Time Ninja |
| Main attack, max range | 1,800 | 3,600 | Supercell release notes, Brawlify |
| Range / ammo / reload | 10 tiles / 3 / 2.3 seconds | Brawlify | |
| Movement speed | 750 (Normal) | Brawlify, Brawl Time Ninja | |
| Super grenades | 4 x 900 | 4 x 1,800 | Brawl Time Ninja |
Primary Attack Breakdown
Piper’s primary attack is a single sniper shot fired from the tip of her parasol. It is fast enough that the community wiki warns her range is “very deceiving,” meaning targets often get hit before they react to the shot leaving the barrel. The practical tip: never fire at close range unless you have to. A point-blank shot is the worst trade in her kit, so use Auto Aimer to buy space first, then shoot.
Two things push a max-range shot even higher. Sitting in a bush with the Ambush star power adds over 1,000 bonus damage at max range (the exact figure scales with Power Level), and Damage Gear adds 15% when she is below half health.
Super Ability Overview
Her Super, “Poppin’,” launches her into the air toward a spot up to 8.67 tiles away and drops four grenades where she took off. According to the Brawl Stars wiki, she is immune to all damage while airborne except status effects and damage over time, so a burning or poisoned Piper will still take ticks mid-jump.
| Super detail | Value |
|---|---|
| Grenade count | 4 (6 with Hypercharge) |
| Damage per grenade (Power 11) | 1,800 |
| Detonation delay | 0.3 seconds |
| Explosion radius | 2 tiles |
Treat the jump as an escape first and a damage tool second. The grenades land behind you, on the spot the diver was running toward, which is exactly where you want them. The Hypercharge version, “Boppin’,” drops six grenades instead of four, makes the jump travel faster, knocks back enemies and destroys terrain where she lands, and gives the usual Hypercharge boost to speed, damage and shield.
Shot Math: What Her Numbers Mean in a Real Fight
Raw stat tables hide how lopsided Piper is, so here is what those numbers turn into, all worked out from the verified Power 11 values above.
- Max range vs point-blank against another Piper: a Power 11 Piper has 5,600 health. Two max-range shots (7,200) delete her. From point-blank, the same kill needs eight shots, close to three full ammo bars with a 2.3-second reload between each. That gap is the whole brawler in one comparison.
- Damage Gear in practice: 3,600 x 1.15 = 4,140 per max-range shot once you drop below half health. That is the difference between a two-shot and a three-shot on a lot of mid-health targets, which is why we pair it with Shield Gear rather than running two defensive gears.
- Snappy Sniping refund: each hit restores 0.4 ammo, so three hits in a row give back 1.2 ammo. In other words, every third clean hit is a free shot. Miss two and the star power does nothing.
- Super ceiling: four grenades at 1,800 is 7,200 if every one lands on the same target. Because they drop in a spread pattern, expect one or two to connect on a moving brawler. Use it to escape, not as a burst combo.
When we compared trackers for this guide, they did not agree on how well she is doing. noff.gg shows a win rate in the mid-40s over its last 30 days, while Brawl Time Ninja shows a figure around 60%. The two sites sample different player pools and time windows, so treat any single win rate as a direction, not a verdict. What both agree on is the build, which is a more useful signal than the headline number.
Recent Balance Changes to Piper
Piper has gone through several balance changes, and the most recent one moved her in a good direction. These are the main changes that shaped how she plays now, newest first, taken from Supercell’s official release notes and the community wiki’s balance history:
- Base health raised from 2,500 to 2,800 and max-range damage raised from 1,700 to 1,800. Her point-blank damage rose with it, since it is always 20% of the max.
- Her Hypercharge, “Boppin’,” was added, giving her Super six grenades instead of four while it is active.
- Before that, she went through a nerf cycle: base health dropped from 2,400 to 2,300 and point-blank damage was cut twice, which is why close-range shots feel so weak today.
- Earlier still, max-range damage was raised to 1,700, Auto Aimer started scaling with Power Level, Ambush got a bigger bonus, and Homemade Recipe lost a third of its range.
The pattern is clear. Supercell keeps making her long-range shot stronger and her close-range shot weaker, so she is more of a pure sniper now than at any point in her history.
The Best Piper Build for Most Situations

On noff.gg’s build data (265 tracked builds), the most common Piper setup is Auto Aimer (75%), Snappy Sniping (67%) and Shield Gear (37%) with Damage Gear (28%) as the usual second gear. We agree with that build, and the reasoning is simple: it covers her biggest weakness (getting dived) and her biggest strength (landing shots) at the same time.
Shield Gear gives her a 900-point shield that recharges while she sits at full health. In Bounty and Knockout there is usually enough downtime between fights for it to come back, which is exactly where Piper wants to be playing. Auto Aimer then handles the moment the shield gets broken, by pushing the attacker away so you can turn the fight back into a long-range one. If you are climbing Ranked and want one setup to learn, this is it.
Snappy Sniping Is the Default, Ambush Is a Map Pick

Snappy Sniping instantly reloads 0.4 ammo every time a shot hits. It also triggers on turrets, minions and other spawnables, and Auto Aimer hits count too, so it works on nearly every map and against nearly every team. Roughly two thirds of tracked Piper builds run it, and on an open map where you are hitting shots, it is the one that keeps your pressure constant.
Ambush is a different kind of pick. It adds a large damage bonus at max range while you are hidden in a bush, which can turn a two-shot into a one-shot combo with a teammate’s chip damage. It only pays off when the map has bushes at the right distance from the enemy’s lanes, when your opponents cannot easily clear those bushes, and when the layout funnels them into your sightline. Firing from a bush also reveals you, so plan to move after every shot. If you cannot name the bush you will sit in before the match starts, take Snappy Sniping.
Best Gadget for Piper: Auto Aimer vs. Homemade Recipe
Auto Aimer fires a shot at the nearest enemy within 7 tiles that knocks them back and slows them for one second. The damage is small. What you are paying for is the knockback, which resets a diver’s approach and buys you the distance your main attack needs.
Homemade Recipe makes your next main attack home in on the nearest enemy. Its range was cut in an earlier balance change, but it is still the right tool for finishing low-health enemies who duck behind cover, and for pressuring throwers such as Tick who sit behind walls all game. The baking theme behind the gadget is a nice touch, but the reason to pick it is purely tactical.
| Feature | Auto Aimer | Homemade Recipe |
|---|---|---|
| Primary use | Peeling off close threats | Finishing low-health targets |
| What it does | Knockback plus 1-second slow | Next shot homes in |
| Best against | Assassins and divers | Retreating or hiding enemies |
| Share of tracked builds (noff.gg) | 75% | 25% |
Auto Aimer is the right answer for most players because staying alive matters more than finishing kills. If your team composition already protects you and the enemy has no real divers, Homemade Recipe is worth a try.
Best Gears for Piper and When to Switch Them
Shield Gear plus Damage Gear is the starting point, for the reasons in the shot math above. One covers the first hit you take, the other makes your shots heavier once you are already hurt.
Shield Gear keeps you alive through the first dive. Damage Gear makes sure you win the trade afterwards.
Swap Shield Gear out when it is not getting time to recharge. That happens in modes where fighting never stops, or when the enemy team pokes you constantly from range so you are never at full health. In those games a gear that helps in the middle of a fight is worth more than a shield that never returns. Gadget Cooldown is the next most common pick on noff.gg (13%), and it makes sense if you lean on Auto Aimer heavily.
Alternative Piper Builds for Ambush Maps and Showdown
The standard build is the best Piper build for most players, but two other setups are worth having ready.
Bush-map build (Ambush, Homemade Recipe, Shield Gear, Damage Gear): use this on maps where a bush sits at max range from an enemy lane. Ambush adds its bonus to shots fired from cover, and Homemade Recipe lets you finish anyone who survives and ducks behind a wall. It hits harder than the standard build, but it gives up Auto Aimer, so only take it when the enemy team has no real divers.
Showdown build: Piper does better in team Showdown than in solo. On noff.gg’s 30-day data, Duo Showdown sits at a win rate near 59% and Trio Showdown higher still, though very few players pick her there, while solo Showdown is under 40%. In Duo or Trio, run the standard build and let your partner handle the brawlers who come close. Solo Showdown maps are full of bushes and players who get close, which are her two biggest problems, so it is not a good mode for pushing trophies with her. If trophy progress is your goal, spend your Piper games in Bounty and Knockout.
How Piper Plays in Bounty, Gem Grab, and Knockout

Many Piper guides list Bounty, Knockout and Gem Grab together as her best modes. The tracker data says that is only two thirds right. On noff.gg’s 30-day mode breakdown, Bounty is her strongest mode at around a 50% win rate, Knockout is close behind at around 48%, and Gem Grab is one of her weakest at around 31%.
Bounty suits her perfectly. You hold a lane from a safe distance, punish anyone who steps into it, and never have to be the one who walks forward. Keeping your own stars low matters as much as taking theirs.
Knockout works for similar reasons. There are no respawns, so one max-range hit early in a round often decides who has to retreat. Hold your position and let the other team come into your range.
Gem Grab is where she struggles, and it is easy to see why. The mode forces fights in the middle of the map, and the gem carrier has to stand near enemies, which is the opposite of what Piper wants. If you do play her there, act as a back-line guard rather than the main threat, and let a brawler like 8-Bit carry the middle while his damage-boosting turret helps your shots hit harder.
When Should You Pick Piper?
If you are wondering what to use on a given map, ask three questions before you lock Piper in. Picking her is as much a team strategy decision as a personal one.
- Is the map open? Long lanes with few walls are where she wins. A map full of walls or thick bushes takes away her best ability before the match starts.
- Is it the right game mode? Bounty and Knockout are her best game modes, and Heist is close to even on noff.gg. Gem Grab and Brawl Ball both sit well below 50% for her, because both modes force fights in the middle of the map, whether you are carrying gems or the ball.
- Does the enemy team have divers? If you see Leon, Stu or Fang on the other side, Piper needs a tank or a strong teammate in front of her. Without one, pick a sturdier brawler instead.
If all three answers go her way, she is one of the strongest picks you can make. If two go against her, choose someone else and save her for the next map.
Best Maps, Counters, and Matchups for Piper

The map matters more than the build. Look for long, open lanes with few walls between you and the enemy, like the classic Bounty map Shooting Star. Tight maps full of walls and bushes take away the distance she needs. Map rotations change often, so check a live tracker before you queue: at the time of writing, noff.gg lists Kaiju Lake, Deep End, Think Ahead and Kroket among her best maps, and Brawl Time Ninja highlights the Knockout map Healthy Middle Ground. For an overview of every brawler you might face on those maps, see our Brawl Stars characters guide.
Her worst matchups are Leon, Stu and Fang. Leon can approach while invisible, Stu dashes in faster than she can reload, and Fang can dash onto her from range. The wiki describes assassin brawlers as a major counter to Piper for exactly this reason: their speed lets them dodge and reach her.
Against a diver, the fight is decided before they reach you. Either you land two max-range shots, or you need Auto Aimer ready.
Divers beat Piper by using walls to break her line of sight, then forcing a fight at close range where her shots do a fifth of their damage. To survive these games, hold Auto Aimer until the diver commits, keep your Super charged as an escape, stay near open ground and next to a teammate who can block for you. Teams that leave Piper alone in a side lane against a Leon tend to lose that lane.
How to Beat Piper on the Enemy Team
Everything that makes Piper hard to play also tells you how to beat her when she is on the other side.
- Close the distance behind cover. Use walls and bushes to approach, and never walk straight at her across open ground. Once you are close, her shots do a fraction of their damage.
- Keep moving at long range. Her attack is a single projectile, so changing direction often makes her miss, and a missed shot costs her ammo and her Snappy Sniping refund.
- Bait Auto Aimer first. It only triggers on enemies within 7 tiles. Step in, let her use it, then commit once it is gone.
- Attack while she is reloading. With three ammo and a 2.3-second reload, she is most vulnerable right after she fires all her shots.
- Punish the Super. Her jump is her only escape. Once she has used it, she cannot get away, and you can avoid the bombs she drops behind her by not chasing straight through the landing spot. Burn and poison effects still damage her while she is in the air.
Best Teammates for Piper
Piper needs a team built to protect her, and the best teammates are the ones who keep divers away from her. A tank such as El Primo, Bull or Bibi in front lets her stay at max range, and support brawlers make the space she plays in safer. 8-Bit’s turret adds damage to her shots, Max’s Super gives the whole team a speed boost that helps Piper reach better positions or get out of trouble, and a healer like Poco helps her make up for her low health.
Avoid team compositions with two other long-range brawlers and no front line. If nobody stands between Piper and the enemy team, the first assassin who reaches the back of the map wins the fight.
How to Unlock and Upgrade Piper
Piper is an Epic brawler, and Epic brawlers are unlocked with Credits. Starr Road has been replaced by Brawler Blast, which gives you a random brawler of the rarity you are unlocking next, rather than letting you choose one. That means you cannot target Piper directly, but saving Credits still moves you toward her. Our guide on how to get Credits in Brawl Stars covers every source.
Once you have her, each upgrade costs Coins and Power Points. Gadgets unlock from Power 7 and Star Powers from Power 9, and her gears and Hypercharge come later in the upgrade path. For Piper, unlock Auto Aimer first, then Snappy Sniping, since those two are the core of her build. If you are not sure whether she deserves your upgrade resources ahead of other brawlers, our Brawl Stars upgrade priority guide can help you decide.
What Skins Does Piper Have in Brawl Stars?
Piper’s skins lean into her character as a sharp-dressed lady. They change her look and animations but not her stats, so pick whichever you like. The community wiki lists skins including Calavera, Cupid, Mariposa, Flag Bearer, Lunar and Athena Piper, alongside older ones such as Pink, Choco, True Silver and True Gold Piper.
Notable Piper Skins Worth Unlocking
Skins are purely cosmetic, so the best one is the one you enjoy playing with. If you want a skin that matches the way she plays, the darker, more dramatic designs suit a patient sniper who waits at the back of the map. The brighter seasonal skins, like Cupid or Lunar Piper, are a good fit if you mainly play her in casual modes. Shop rotations change, so check the in-game shop for what is currently available.
Questions Players Ask About Piper
Is Piper a Good Choice for Beginner Players in Ranked Mode?
Not as your main Ranked pick. She punishes missed shots and bad positioning harder than almost any other brawler. Practice her in casual Bounty first, then bring her into Ranked when the draft lands on an open map.
Can Piper Be Used Effectively in Team Compositions With Tanks?
Yes. Pair her with a tank such as El Primo, Bull or Bibi who can stop divers from reaching her, and let her deal damage from behind. The third slot should be a brawler who can finish off weakened enemies.
What Rank Can Piper Realistically Reach in the Current Meta?
There is no fixed ceiling. Trackers disagree on her win rate, so treat her as a map pick. She is strong when the draft lands on an open Bounty or Knockout map and a risky choice anywhere else. Good players take her far up the ladder by only picking her where she fits.
How Does Piper Compare to Other Marksman Brawlers?
Piper depends on range more than any other marksman. She hits extremely hard at max distance and very weakly up close. Mandy gains range by standing still to focus, and Bea rewards a hit with a supercharged next shot, so both are more consistent across different maps. Piper has the higher peak on the right map.
Is Piper Worth Unlocking if You Already Own Other Snipers?
Yes, if you enjoy precise aiming. Brock deals splash damage and can break walls, while Piper is a single-target sniper who rewards exact shots. They do different jobs, so owning one does not replace the other. If you also play Max or other support brawlers, Piper gives you a true back-line option for open maps.
Common Piper Mistakes
Most lost Piper games come down to a few habits. Firing point-blank, at a fifth of your damage, is the most expensive one. Using Auto Aimer on the first enemy you see instead of saving it for the diver is the second. Spending your Super for damage when you will need it to escape thirty seconds later is the third. Fix those three habits and positioning takes care of most of the rest: stay at the back of the map, keep distance from walls the enemy can use to approach, and make every enemy cross open ground to reach you.
